This post may contain affiliate links meaning that at no cost to you I may receive a small commission if you make a purchase using my link. I thank you for your support! Please read my DISCLOSURE for more info.

I don’t know about you but I am never ready for winter! Neither as a gardener nor as a person. I am a spring-summer person. However, our outdoor gardening season which we tried to extend as much as we could, even keeping a few of the tomato plants in the greenhouse, had come to its end in November. But! If you are passionate about growing some food even when it is freezing outside, you can still explore the winter gardening options. Have you ever tried to grow food on your windowsill? And did you want to learn how to grow microgreens?
Let’s first find out what microgreens are
Microgreens are tiny plants that similar to sprouts but grown in soil or in soil substitute. They are packed with flavor, vitamins and delicious. Some plants you would harvest at the cotyledon stage (the first leaves that are not considered the real leaves). These include beets, spinach, various lettuces, and sunflower. Whereas, some can be harvested at the later stage, like pea shoots. They are very favoured by gourmet restaurants and foodies all over the world!

Our favourites are green and red lettuce, pea shoots, sunflowers, pakchoy (or bok choy), kale, radishes, mustards, beets, and even herbs (cilantro, dill, parsley).
The benefits of microgreens
This post sums up a research article where the researchers claim that microgreens have up to 40 times more vital nutrients than mature plants! If this is not a good enough reason for you to start eating them just think how gorgeous they look in a sandwich or as a garnish to your main dish 😉
I am sure your kids will be curious to try out those tiny seedlings too 🙂 You can start a project with them and have them grow their own “garden” and later add the sprouts to the sandwich they can make on their own! Just imagine a toasted avocado sandwich with those tiny sprouts of kale or radishes on it 😉 Mmmmm…
How to grow microgreens
Because they only grow for a couple of weeks from the time you plant the seeds to the harvest, you don’t need to use planting soil. We, actually, grow microgreens in coconut coir (if you are in Canada you can get it at the Home Hardware). It is a sustainable growing medium alternative to soil or moss.
The energy and nutrients of the seed are enough to have the seed sprout and grow till harvest without additional soil enhancements or fertilizing.
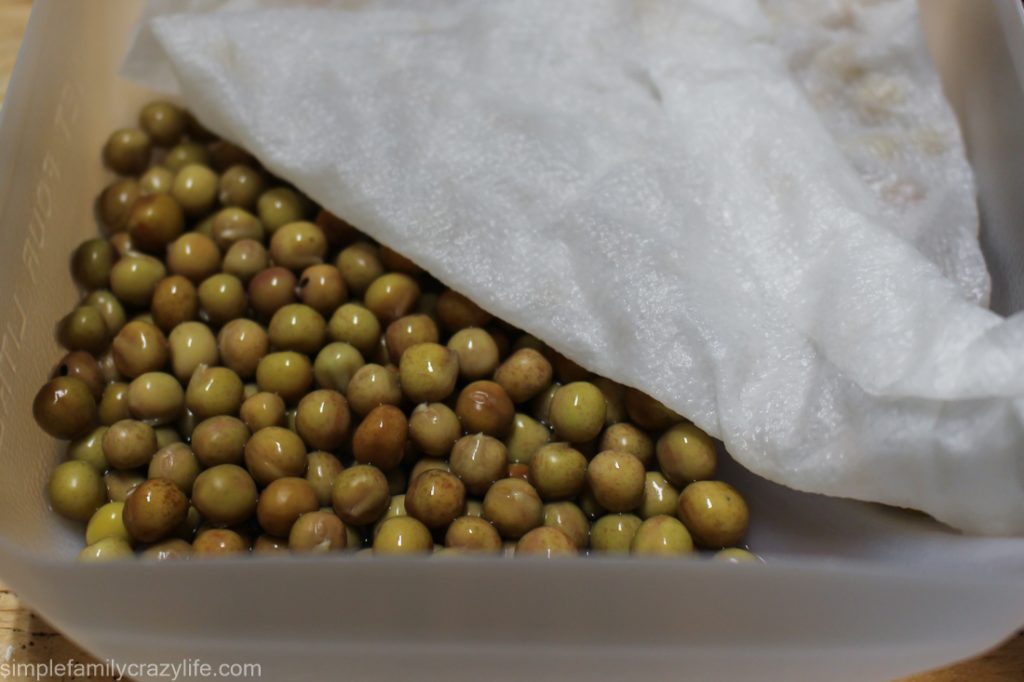
Some seeds like peas or sunflower seeds will require pre-soaking before you plant them. But the majority of them can just be sown without pre-soaking.
- Fill a plastic container with soil to a depth of about 2″ (5cm). We use recycled veggie or mushroom containers but you can purchase specialty trays as well. I will provide links to products for your convenience below.
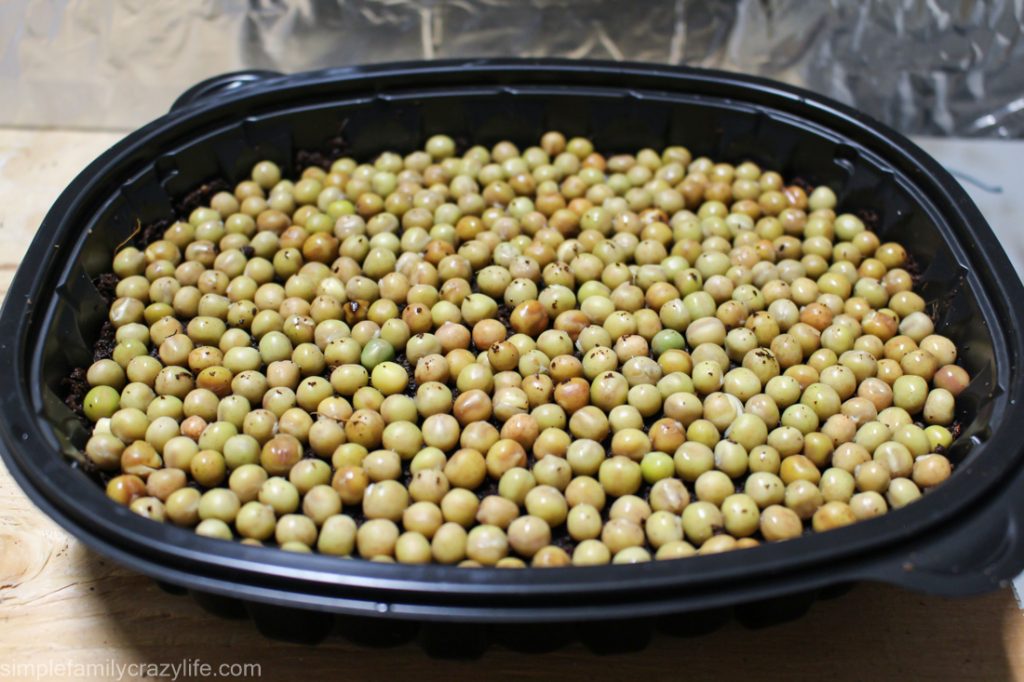
- Generously spread the seeds on the top of “soil”, gently mist it with water using a spray bottle.
- Cover the tray with either transparent plastic cover or a similar planting tray.
- Keep the seeds and soil wet but not soggy.
- When the seedlings are about an inch (2.5cm) tall, remove the cover.
Pre-soaking peas:

Peas are spread on the top of the coconut coir:

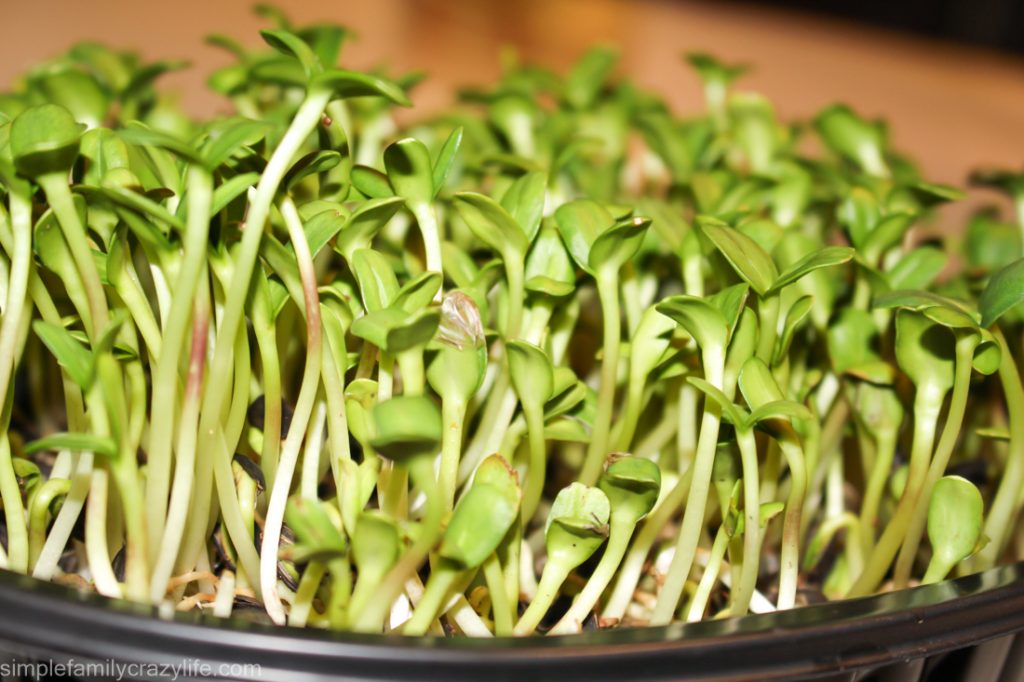
Sunflowers’ tiny sprouts:

If you are using a non-transparent cover, you will notice that your sprouts are yellowish. That is normal as they lack chlorophyll, the green pigment in plants and algae. When the cover is removed, the plants will quickly change their colour to green if have access to light. The natural light from a window is good enough even during the short winter days.

Some challenges in growing microgreens
Microgreens are very easy to grow. However, sometimes you may encounter some of the following:
- Mould or mildew – many times caused by overwatering and lack of fresh air circulation. Check your seedlings daily for the first signs of mould. We only had experienced that once and preferred to simply through the tray to the compost bin. There are products to kill the mould but we rather prefer not to take a risk and don’t like using any chemicals in our food.
- Uneven germination – mainly a concern of the large-scale businesses. We personally do not care if some of our seeds germinate slower than others. If it is a concern for you, keeping the soil moist (but not soggy) usually helps to have a better germination rate.
- Cost of seeds and growing equipment – for us it is mainly the cost of coconut coir and some seeds. As we have mentioned we re-use the veggie containers and simply wash them between the plantings. We do not use additional lighting and simply keep the sprouts on the kitchen windowsill.
Where to get the seeds for microgreens
There are many places where you can find seeds for microgreens. If you are a gardener, you can let some of your plants to go to seed and collect the seeds
We like to order peas and sunflower seeds from this company but they have so many other non-GMO seeds as well! Their service is awesome and they offer free shipping on orders over $25 in Canada and over $50 in the US.
You can find a brief list of our favourite companies for seeds orders in our post here.
Also, we like collecting our own seeds and let a few of our backyard plants go to seed. This year we have collected pakchoy, kale, mustard, arugula, and cilantro seeds and have been using them for microgreens.
How to eat microgreens
As mentioned above, they are great for sandwiches, soups, and side dishes. They add a beautiful accent to the plate!
We also like to add them to the stir-fries. Do Not Cook Them! Keep them fresh and full of nutrients.
Store them in sandwich bags or plastic/glass containers in the fridge for up to 5-7 days. We usually have to trays on the go, and start the new two each week, depending on their germination and growth rate.

What are your favourite microgreens?
Do you grow some that I haven’t mentioned here? Do you have any tips for others that you don’t mind sharing here? As always, we will be happy to read your comments below 🙂


